


Master the Art of Plant Repotting: Essential Tips for Healthy Growth
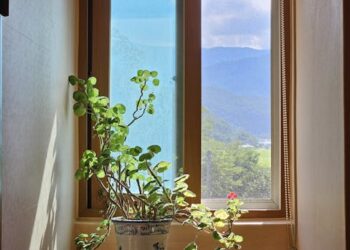
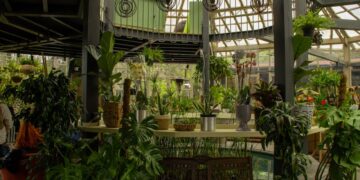
Keeping your indoor plants thriving involves more than just regular watering and exposure to adequate sunlight. One key aspect of plant care that can dramatically impact their health and growth is the art of repotting. Repotting doesn’t just involve transferring a plant into a new pot; it’s about refreshing its environment and giving its roots the essential space to grow. Whether you are a seasoned gardener or a novice green thumb, understanding when and how to repot your plants is crucial. This guide will equip you with all the information you need to master plant repotting, ensuring your green friends not only survive but thrive.
Understanding the Importance of Repotting
Repotting is vital for several reasons. As plants grow, their root systems expand. If they are not given enough room, they can become “root-bound,” a condition where the roots circle around the pot, which can stifle growth and lead to unhealthy plants. Moreover, soil in pots gradually loses its nutrients. Refreshing the soil and giving roots more room to spread helps in maintaining plant health and vigor.
Recognizing When to Repot
Signs that Your Plant Needs a Bigger Home
The timing of repotting is critical to avoid stressing the plants. Here are a few indicators that suggest your plant might be ready for a new pot:
- Roots are growing through the drainage holes: Visible roots at the bottom of the pot are a clear sign that your plant needs more room.
- Watering issues: If water sits on top of the soil or runs straight through the pot, it might mean that the plant is too root-bound to absorb water properly.
- Visible salt and mineral buildup: White, crusty salts on the soil surface can indicate depletion of the soil and the need for a fresh soil environment.
- Stunted growth despite proper care: If your plant isn’t growing as expected, it might need more room to expand.
Choosing the Right Pot
Size, Material, and Drainage Considerations
Selecting the appropriate pot is more than just fitting your décor; it affects how well your plants will grow:
- Size: Choose a pot that is 1-2 inches larger in diameter than the current one for small to medium-sized plants, and 2-3 inches for larger plants. Avoid going too big; too much soil can sog the roots leading to root rot.
- Material: Pots can be made from various materials like clay, plastic, metal, or wood each with its pros and cons. For instance, clay pots are porous and enhance soil dry out more quickly, while plastic pots retain moisture better.
- Drainage: Ensure the new pot has adequate drainage holes to prevent waterlogging, which can lead to root decay. If it doesn’t, consider drilling holes.
The Step-by-Step Guide to Repotting
Preparation, Execution, and Post-Repotting Care
Now that you know when and what pot to choose, here’s how to repot your plant:
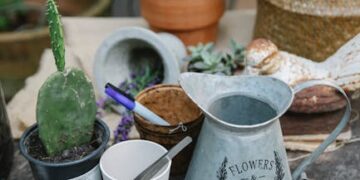
1. Prepare Your Workspace
Gather all necessary supplies — new pot, fresh potting soil, watering can, and scissors or pruning shears. Lay out newspaper or a tarp to keep the area clean.
2. Remove the Plant
Gently take the plant out of its current pot. Tap the pot’s edges and wiggle the plant out while supporting the base. If the plant is stubborn, try running a knife along the inside of the pot.
3. Prune the Roots
Inspect the root ball. If you see very tight circles of roots, delicately tease them apart. Trim away any excessively long or rotten roots to promote healthier growth.
4. Add New Soil
Fill the new pot about one-third with fresh potting soil. Center the plant in the new pot and add soil around the sides, gently tamping down as you go to eliminate air pockets.
5. Water Generously and Place in Ideal Conditions
After repotting, water the plant thoroughly. This helps settle the soil and eliminates further air gaps. Place the plant in a location where it will receive adequate light and not be exposed to drafts.
Post-Repotting Care
The first few weeks after repotting are critical. Keep the soil moist but not waterlogged, and avoid fertilizing for about 4-6 weeks as the roots are still delicate and adjusting. Observe the plant’s response to its new surroundings and adjust care routines as necessary.
FAQs in Plant Repotting
Common Concerns and Expert Answers
- How often should I repot my indoor plants?
- Generally, most indoor plants need to be repotted every 12-18 months, but it can vary depending on the plant’s growth rate and species.
- Can I reuse old potting soil?
- It’s best to use fresh potting soil to provide your plants with new nutrients and to avoid any pathogens that might be present in the old soil.
- What is the best season for repotting plants?
- Spring is the ideal time because plants are beginning their most active growth phase, which helps them quickly recover from the trauma of repotting.
Conclusion
Plant repotting is a vital part of maintaining plant health and vigor. By following these steps and tips, you’ll ensure your plants have the best environment to thrive. Remember, repotting is not just a routine task, but a chance to reconnect with your plants and understand their needs better, enhancing your relationship with your green companions.